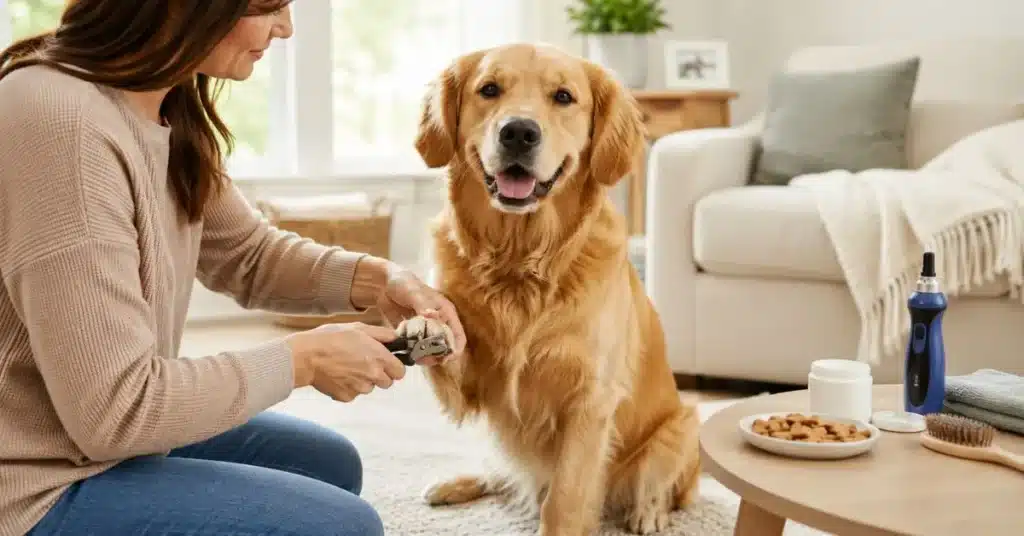
To trim dog nails at home safely, use dog nail clippers or a grinder, hold your dog’s paw gently, and cut only a tiny amount from the nail tip at a time. The goal is to avoid the quick, keep your dog calm, and stop before the session becomes stressful.
From my 15 years of dog care experience, the safest method is to go slowly, reward your dog often, and never force the trim if your dog becomes nervous or pulls away.
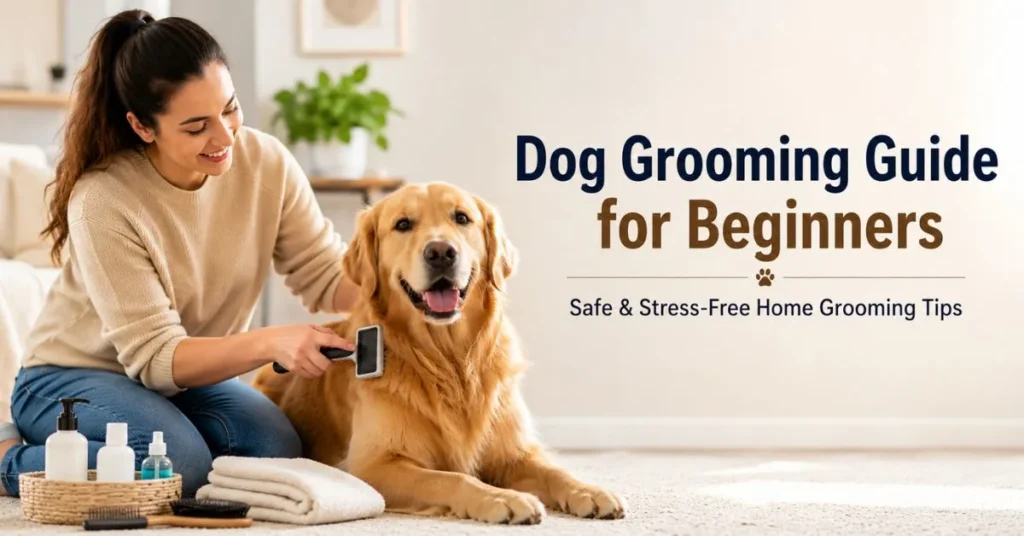
Quick Answer: How to Trim Dog Nails at Home
To trim dog nails at home safely, start with a calm dog, a clean dog nail clipper or grinder, and a few treats nearby. Hold your dog’s paw gently, find the nail tip, and trim only a tiny amount at a time so you do not cut into the quick.
Follow these simple steps:
- Choose dog nail clippers or a dog nail grinder.
- Keep treats and styptic powder nearby before you start.
- Hold your dog’s paw gently without squeezing.
- Look for the nail tip and avoid the quick.
- Trim only a small amount from the end of the nail.
- Check the nail after every small cut.
- Reward your dog and stop if they become stressed or nervous.
For beginners, it is better to trim less and repeat later than to cut too much at once. If your dog pulls away or seems uncomfortable, stop the session and try again another day.
Before You Start: Dog Nail Trimming Safety Checklist
Before you trim your dog’s nails at home, check three things first: your dog, your tools, and the paw. Safe dog nail trimming starts before you make the first cut.
Use this quick dog nail trimming checklist before every session:
- Your dog is calm and not overly excited.
- Good lighting is available.
- Your dog nail clippers or grinder are clean.
- Treats are nearby for rewards.
- Styptic powder is ready in case of bleeding.
- The paw has no swelling, bleeding, cracked nail, or broken nail.
- You are ready to trim only a tiny amount from the nail tip.
- You will stop if your dog becomes stressed, nervous, or pulls away.
Safety note: This guide is for routine nail trimming at home. Do not trim at home if your dog’s nail is broken, bleeding, swollen, infected, curled into the paw pad, or very painful.
In those cases, contact a veterinarian or professional groomer. It is safer than trying to fix a painful nail at home.
Why Dog Nail Trimming Matters
Dog nail trimming is not just about appearance. It is a normal part of dog nail care and your dog’s overall grooming routine.
When dog nails get too long, walking can feel uncomfortable. Long nails may press against the floor, change how your dog places their paw, or make them slip more easily on hard surfaces.
Overgrown nails can also catch on carpet, bedding, or outdoor surfaces. In some cases, nails may start to curl, especially if they are not checked often.
Do not forget the dewclaws. These nails sit higher on the paw and may not touch the ground, so they often do not wear down naturally like other nails.
Regular nail checks help you catch long nails before they become harder to trim. For a full care routine, see our beginner dog grooming guide.
How to Know Your Dog’s Nails Are Too Long
Dog nails are too long when they start touching the floor too much or change how your dog walks. You do not need to wait until the nails become overgrown before checking them.
Here are common signs your dog’s nails may need trimming:
- You hear a clicking sound when your dog walks on hard floors.
- The nails touch the floor when your dog is standing normally.
- The nail tips are starting to curve.
- Your dog walks awkwardly or avoids putting full weight on the paw.
- Your dog licks the paw or seems uncomfortable.
- The dewclaws look long because they do not wear down naturally.
A small amount of nail contact may be normal for some dogs, but long nails should not make walking uncomfortable. If the nails are curling, pressing into the paw pad, or causing pain, do not try to fix them aggressively at home.
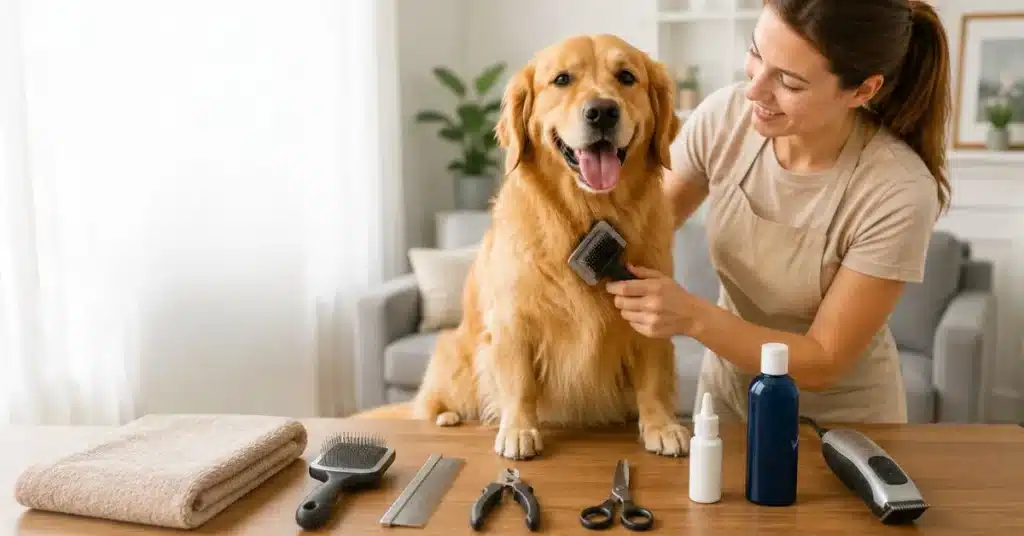
Tools You Need to Trim Dog Nails at Home
The right tools can make dog nail trimming easier. But tools alone do not make it safe. The safest tool is the one you can control well. Your dog should also stay calm while you use it.
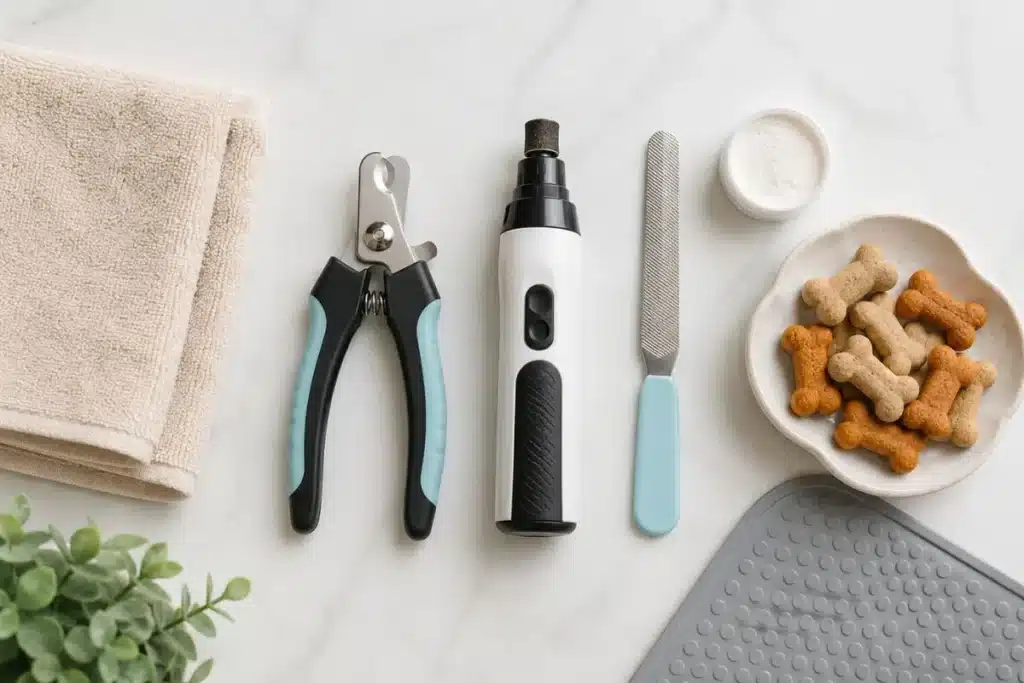
Before you start, keep these tools nearby:
- Dog nail clippers — for quick, small cuts from the nail tip.
- Dog nail grinder — for slowly smoothing the nail.
- Nail file — for softening sharp edges after trimming.
- Treats — for rewarding calm behavior.
- Towel or non-slip mat — to help your dog stay steady.
- Styptic powder — to help control bleeding if you cut too short.
- Good lighting — to help you see the nail tip and avoid the quick.
For most beginners, a sharp dog nail clipper is the easiest tool to start with. It helps you make small, controlled cuts.
A dog nail grinder can also work well. It removes the nail slowly instead of cutting it in one clip. However, some dogs dislike the sound or vibration.
Do not choose a tool only because it is popular. Choose the tool that feels safe in your hand and keeps your dog comfortable.
Simple Tests Before You Trim
Before you trim your dog’s nails, do a few simple comfort tests. These tests help you see if your dog is ready, nervous, or needs more time.
If your dog is afraid of nail clipping, do not start by cutting. Start by building trust with the paw, the tool, and the sound.
Paw Handling Test
Gently hold your dog’s paw for 3–5 seconds. Do not squeeze or pull. If your dog stays calm, give a treat and praise. If your dog pulls away, let go and try again later.
This helps your dog learn that paw handling is not scary.
Clipper Sound Test
Hold the nail clipper near your dog, but do not cut the nail yet. Open and close the clipper once so your dog hears the sound.
If your dog stays calm, give a treat. If your dog jumps, moves away, or looks stressed, practice this for a few short sessions before trimming.
You can do the same test with a nail grinder. Turn it on for a few seconds, reward your dog, and turn it off.
One-Nail Test
For the first session, trim only one nail. Then reward your dog and stop.
This may feel slow, but it helps prevent fear. One calm nail trim is better than a stressful full session.
If your dog becomes nervous, pulls away, pants, growls, or keeps trying to leave, stop trimming. Give your dog a break and try again another day.
From my 15 years of dog care experience: preparation matters more than speed. If your dog is already nervous before you start, the nail trim usually becomes harder.
How to Trim Dog Nails at Home Step by Step
Learning how to trim dog nails at home is easier when you follow a slow, simple process. Do not rush, and do not try to finish every nail in one session.
The safest beginner method is simple: trim a tiny amount, check the nail, and reward your dog often.
Step 1 — Choose a Calm Time
Trim your dog’s nails when your dog is calm, relaxed, or slightly tired. After a walk or play session can be a good time because your dog may be less energetic.
Avoid trimming when your dog is excited, stressed, hungry, or trying to play. A nervous dog may pull the paw away, move suddenly, or become afraid of the nail trimming process.
If this is your first time, keep the session short. One paw, or even one nail, is enough for a beginner session.
Step 2 — Let Your Dog Sniff the Tool
Before cutting, show your dog the nail clipper or grinder. Let your dog sniff it for a few seconds.
Do not move straight to trimming. Give your dog a treat after they look at or sniff the tool calmly. This helps create a positive connection with the tool.
If you use a dog nail grinder, turn it on for a few seconds before touching the nail. Some dogs dislike the sound or vibration, so introduce it slowly.
Step 3 — Hold the Paw Gently
Hold your dog’s paw with a gentle but steady grip. Do not squeeze the paw tightly.
Use your fingers to support the toe you want to trim. Press lightly if you need to make the nail easier to see.
If your dog pulls the paw away, do not fight them. Let go, give a short break, and try again. Forcing the paw can make your dog more afraid of nail clipping.
Also check the dewclaw if your dog has one. Dewclaws sit higher on the paw and may not wear down naturally.
Step 4 — Find the Safe Trimming Area
Look at the nail tip before you cut. The safe area is usually the very end of the nail, away from the quick.
The quick is the sensitive part inside the nail. It contains blood vessels and nerves, so cutting into it can cause pain and bleeding.
On light-colored nails, the quick may look pink. On black nails, it is harder to see, so trim only tiny amounts from the nail tip.
If you are not sure where the quick starts, read our detailed guide on how to find the quick in dog nails before you continue.
Step 5 — Trim a Tiny Amount
Place the clipper at the nail tip and cut only a small piece. Do not cut a large part of the nail at once.
For beginners, the tiny-cut method is safer. You can always trim a little more later, but you cannot undo cutting too far.
If you use a grinder, touch it lightly to the nail for a short time. Do not hold the grinder in one spot too long because it may feel warm or uncomfortable.
The goal is not to finish quickly. The goal is to keep your dog calm and avoid the quick.
Step 6 — Check After Every Cut
After each small cut, stop and check the nail. Look at the center of the nail before trimming more.
For light nails, make sure you are still away from the pink quick. For black nails, go slowly and stop if the center of the nail starts to look different.
Also check your dog’s body language. If your dog starts pulling away, panting, licking lips, shaking, or trying to leave, take a break.
Safe dog nail trimming means watching both the nail and the dog.
Step 7 — Reward and Stop Early If Needed
Reward your dog after each nail, even if the trim is very small. Treats, praise, and calm handling help your dog feel safer next time.
Do not force yourself to finish all the nails in one session. If your dog becomes nervous, stop before the session turns stressful.
For some dogs, trimming one nail per day is a better starting point. Over time, your dog may become more comfortable with the routine.
From my 15 years of dog care experience: my beginner rule is simple — Touch → Tiny Cut → Treat. Touch the paw gently, trim a tiny amount, and reward your dog right away. A calm, short session is better than a full trim that makes your dog afraid.
How to Avoid Cutting the Quick
The most important part of safe dog nail trimming is learning how to avoid cutting the quick. The quick is the sensitive part inside your dog’s nail. It contains blood vessels and nerves, so cutting into it can cause pain and bleeding.

On light-colored nails, the quick is usually easier to see. It may look like a pink area inside the nail. In that case, trim only the clear nail tip and stay well away from the pink part.
Black nails are harder because the quick is not clearly visible. Do not guess or make one big cut. Instead, trim tiny amounts from the nail tip and check the nail after each cut.
A safe beginner rule is simple: cut less than you think you need to. You can always trim a little more later, but you cannot undo cutting too far.
Stop trimming if you are unsure where the quick starts. Also stop if your dog pulls away, becomes nervous, or the nail center starts to look different.
How to Trim Black Dog Nails Safely
Black dog nails are harder to trim because the quick is not easy to see. So you need to go slowly and avoid big cuts.
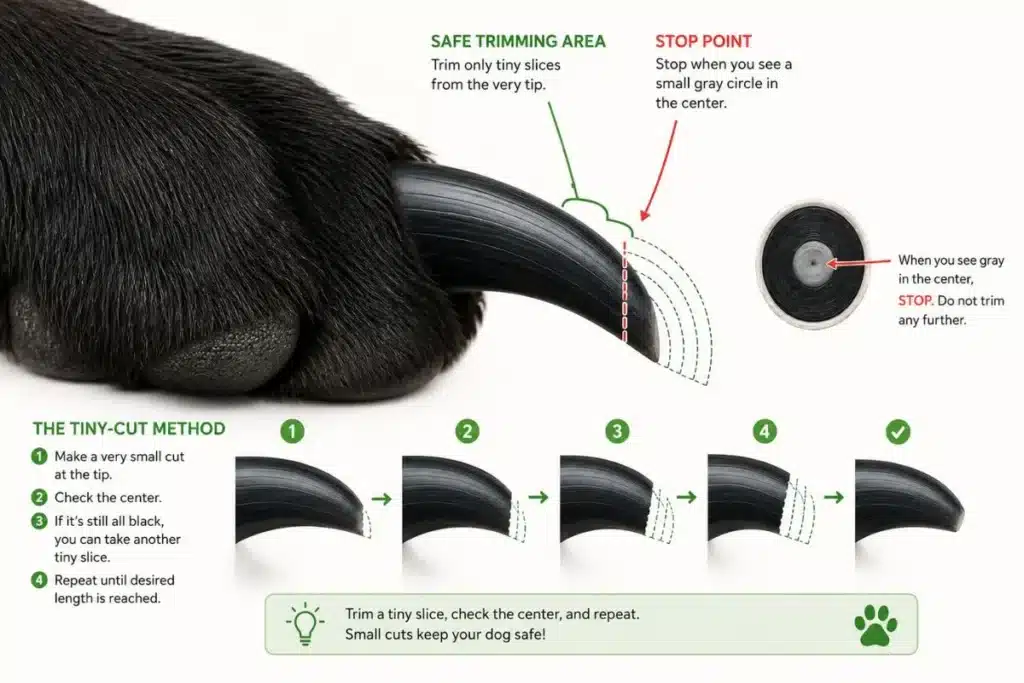
Do not guess where the quick starts. Trim only a tiny slice from the nail tip first.
After each small cut, stop and check the center of the nail. If the center starts to look darker, softer, or different from the outer nail, stop trimming.
For beginners, it is safer to leave the nail a little longer than to cut too close. You can always trim a little more after a few days.
If your dog’s black nails are overgrown, do not try to shorten them all in one session. Small weekly trims are usually safer and less stressful.
Stop early if your dog pulls away, becomes nervous, or you feel unsure. If the nails are curled, painful, or very overgrown, ask a groomer or veterinarian for help.
What to Do If You Cut Your Dog’s Nail Too Short
Accidentally cutting your dog’s nail too short can feel scary. But the most important thing is to stay calm and stop trimming right away.
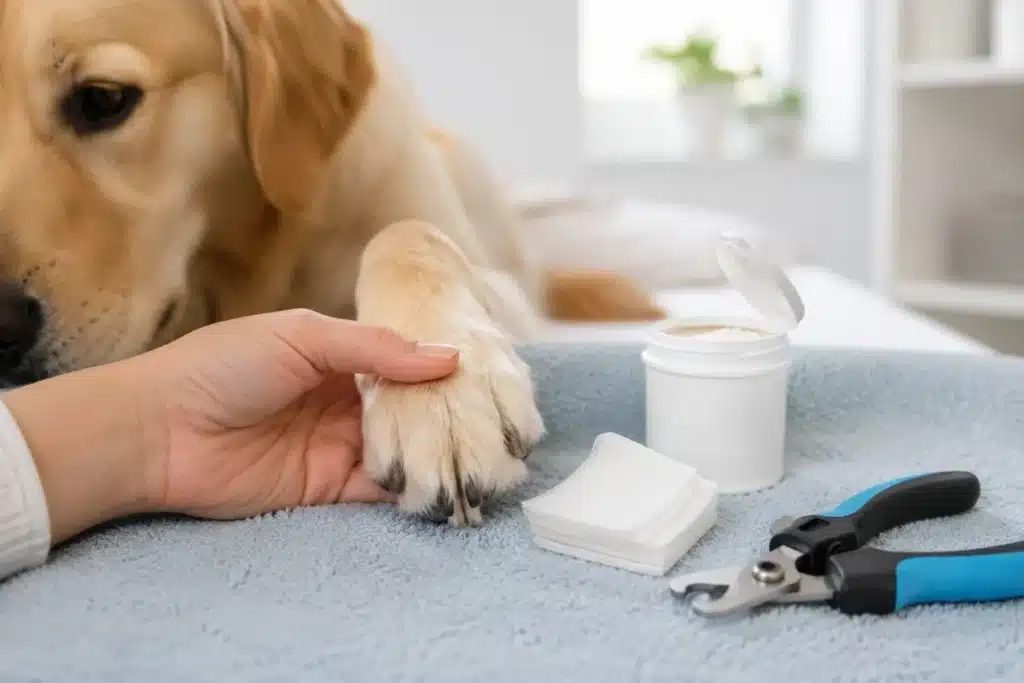
If you cut into the quick, the nail may bleed and your dog may feel pain. Do not continue with the other nails. Focus on helping your dog first.
Follow these steps:
- Stay calm: Your dog may become more nervous if you panic.
- Stop trimming immediately: Put the clipper or grinder down and give your dog a break.
- Apply gentle pressure: Use a clean cloth, tissue, or gauze to press lightly on the nail.
- Use styptic powder if you have it: Styptic powder can help control minor dog nail bleeding. This is why keeping styptic powder for dog nails nearby before trimming is a smart safety step.
- Comfort your dog: Speak calmly, give gentle praise, and avoid scolding. Your dog needs to feel safe after the mistake.
- Watch the nail closely: If bleeding does not stop, the nail looks damaged, or your dog seems in strong pain, contact a veterinarian.
AKC also recommends using styptic powder or a clotting product and calling your vet if bleeding does not stop.
Do not restart the nail trimming session right away. Your dog may now feel stressed or afraid, so it is better to stop and try again another day.
What If Your Dog Is Afraid of Nail Clipping?
If your dog is afraid of nail clipping, do not force the trim. Fear can get worse if your dog feels trapped, rushed, or held too tightly.
Start with paw handling before you use any tool. Gently touch your dog’s paw for a few seconds, then give a treat. Repeat this until your dog stays calm.
Next, let your dog see and smell the nail clipper or grinder. Do not cut the nail yet. Just show the tool, reward calm behavior, and keep the session short.
If your dog reacts to the sound, practice tool desensitization. Open and close the clipper near your dog, or turn the grinder on for a few seconds. Then reward your dog with treats and praise.
For nervous dogs, trim only one nail in the first session. One calm nail is better than forcing a full trim and making your dog more scared.
Watch for stress signs like pulling away, panting, shaking, lip licking, growling, or trying to leave. If your dog starts to panic, stop before the fear gets worse.
If your dog growls, snaps, bites, or reacts strongly every time, do not handle it alone. A professional groomer or veterinarian can help make nail trimming safer for both you and your dog.
Dog Nail Clippers vs Grinder: Which Is Better?
Both dog nail clippers and grinders can work well. The best tool depends on your dog’s comfort, your confidence, and how much control you have during trimming.
For many beginners, nail clippers feel simple and fast. But you need to be careful not to cut too much at once.
A dog nail grinder removes the nail slowly. This can feel safer for some owners, but some dogs dislike the noise or vibration.
| Tool | Best For | Be Careful About |
| Nail clippers | Fast, small trims | Cutting too much at once |
| Dog nail grinder | Gradual smoothing | Noise, vibration, and heat |
| Nail file | Smoothing sharp edges | Takes more time |
If your dog stays calm with a clipper, start with tiny cuts from the nail tip. If your dog has thick nails or you want more gradual control, a grinder may be helpful.
However, do not hold a grinder on one spot for too long. It can create heat and make your dog uncomfortable.
To reduce heat and discomfort, The Spruce Pets recommends using short grinder intervals.
There is no perfect tool for every dog. Choose the tool that feels safe in your hand and keeps your dog calm.
Common Dog Nail Trimming Mistakes
Small dog nail trimming mistakes can make the session stressful. But most beginner mistakes are easy to avoid if you go slowly.
Here are the most common mistakes and the simple fix for each one:
Mistake: Cutting too much at once This can hit the quick and cause pain or bleeding.
Fix: Use the tiny-cut method. Trim a small amount, check the nail, then decide if you need to trim more.
Mistake: Ignoring your dog’s stress A nervous dog may pull away, pant, shake, or try to leave.
Fix: Stop early. A short, calm session is better than forcing a full trim.
Mistake: Skipping the dewclaws Dewclaws sit higher on the paw and may not wear down naturally.
Fix: Check the inner paw during every nail trimming session.
Mistake: Waiting until nails are overgrown Overgrown nails are harder to trim safely. The quick may also be longer.
Fix: Check your dog’s nails weekly and trim small amounts when needed.
Mistake: Starting without styptic powder If bleeding happens, you need to act calmly and quickly.
Fix: Keep styptic powder nearby before you start.
How Often Should You Trim Dog Nails?
How often you should trim dog nails depends on your dog’s nail growth, activity level, and walking surface. There is no one schedule that fits every dog.
A good habit is to check your dog’s nails once a week. You may not need to trim every time, but weekly checks help you notice long nails before they become overgrown.
Many dogs need nail trimming every few weeks. Active dogs that walk often on pavement may naturally wear their nails down faster. Indoor dogs, senior dogs, puppies, and less active dogs may need more frequent checks.
Do not forget the dewclaws. Dewclaws sit higher on the paw and usually do not touch the ground, so they may not wear down naturally.
If you hear clicking on hard floors, see the nails touching the floor, or notice the tips starting to curve, it may be time for a trim.
When to Ask a Groomer or Vet
At-home nail trimming is best for routine dog nail care. But some nail problems are safer for a professional groomer or veterinarian.
Ask for help if your dog’s nail is cracked, split, bleeding, swollen, or looks infected. Do not try to trim a painful or injured nail at home.
For more medical context, The Spruce Pets explains why nail injuries or infection signs should be checked by a vet.
You should also contact a groomer or vet if the nail is curled into the paw pad. This can be painful, and cutting it the wrong way may cause more injury.
Stop trimming if your dog panics, growls, snaps, or tries to bite. In that situation, safety comes first. A professional can help handle the nail trim more calmly.
You should also get help if:
- The bleeding does not stop.
- Your dog shows signs of pain.
- You cannot tell where to cut.
- The nails are severely overgrown.
- Your dog is senior or has a paw health issue.
This guide is for normal nail trimming at home. If there is a dog nail injury, heavy bleeding, infection, or strong fear response, a groomer or veterinarian is the safer choice.
Dog Nail Maintenance Tips After Trimming
Dog nail maintenance does not end after one trim. A simple routine can help keep dog nails short, healthy, and easier to manage at home.
Check your dog’s nails once a week. You may not need to trim them every time, but weekly checks help you notice long nails early.
Trim small amounts more often instead of waiting until the nails become overgrown. Short, calm trims are usually easier than one big trimming session.
Reward your dog after every session, even if you only trimmed one nail. Treats and praise help your dog build a better connection with nail care.
Keep your dog nail clippers clean and dry after use. If the blade becomes dull, replace it. Dull blades can crush the nail and make trimming uncomfortable.
Regular walks on pavement may help wear down some nails naturally. But this does not replace nail checks, especially for indoor dogs, senior dogs, or less active dogs.
Do not forget the dewclaws. Dewclaws sit higher on the paw, so they may not touch the ground or wear down naturally.
Frequently Asked Questions About Trimming Dog Nails at Home
Can I trim my dog’s nails at home?
Yes, many dog owners can trim routine nails at home if the dog is calm and the nails are not injured. Go slowly, use dog-safe tools, and cut only tiny amounts from the nail tip.
How short should dog nails be?
Dog nails should be short enough that they do not press heavily into the floor while your dog is standing. Avoid cutting into the quick, because that can cause pain and bleeding.
How do I know where the quick is?
On light-colored nails, the quick may look like a pink area inside the nail. On black nails, the quick is harder to see, so trim tiny slices and stop if the center of the nail starts to look different.
What happens if I cut the quick?
If you cut the quick, the nail may bleed and your dog may feel pain. Stay calm, apply gentle pressure, use styptic powder if you have it, and contact a vet if the bleeding does not stop.
Is a nail grinder better than clippers?
A nail grinder can be helpful for gradual trimming and smoothing sharp edges. But some dogs dislike the noise and vibration. Clippers are faster, but they need careful control.
What if my dog won’t let me cut his nails?
Start with paw handling before trimming. Let your dog get used to the tool, reward calm behavior, and try one nail at a time. If your dog panics, growls, or snaps, stop and ask a groomer or vet for help.
How often should I trim dog nails?
Check your dog’s nails once a week. Many dogs need trimming every few weeks, but it depends on nail growth, activity level, and walking surface.
Should I trim my dog’s dewclaws?
Yes, check the dewclaws during every nail session. Dewclaws sit higher on the paw and may not touch the ground, so they often do not wear down naturally.
Can I use human nail clippers on my dog?
It is better to use dog nail clippers or a dog nail grinder. Human nail clippers are not designed for most dog nails and may make trimming harder or less controlled.
When should I not trim dog nails at home?
Do not trim at home if the nail is broken, bleeding, swollen, infected, curled into the paw pad, or very painful. In those cases, a veterinarian or professional groomer is the safer choice.
Final Thoughts on Trimming Dog Nails at Home
Trimming dog nails at home can be safe and manageable when you go slowly, use the right tools, and cut only tiny amounts from the nail tip. The main goal is not to finish quickly. The goal is to avoid the quick, keep your dog calm, and stop before the session becomes stressful.
If your dog is nervous, start small. One nail or one paw is enough for the first session. With regular practice, treats, and gentle handling, many dogs become more comfortable over time.
But at-home nail trimming is only for routine care. If the nail is broken, bleeding, infected, curled into the paw pad, or your dog reacts strongly, contact a veterinarian or professional groomer.
From my 15 years of dog care experience: a calm, short nail trim is always better than a rushed full trim that makes your dog afraid.