To clean dog ears at home safely, check the ear first. Look for redness, swelling, pain, discharge, or a strong bad smell.
If the ear looks normal but has mild wax or light dirt, use a vet-approved dog ear cleaner. Gently massage the base of the ear, let your dog shake, then wipe only the visible outer ear with cotton balls or gauze.
Never push Q-tips deep into the ear canal. If your dog’s ear looks painful, infected, swollen, or smells very bad, stop cleaning and call your vet before putting anything inside the ear.
A Quick Safety Note Before You Start
Dog ear cleaning is helpful only when the ear is safe to clean. This guide is for routine ear cleaning, such as removing mild wax or light dirt from your dog’s ears at home.
It is not a treatment guide for a dog ear infection, ear mites, yeast infection, or any kind of ear injury. If your dog’s ear is red, painful, swollen, has discharge, or smells very bad, do not clean it at home. Stop and contact your vet first.
If you are not sure whether your dog’s ear is just dirty or infected, read our guide on how to tell if your dog has an ear infection before putting any cleaner inside the ear.
When in doubt, it is always safer to ask your veterinarian before cleaning. This is especially important if your dog has a history of ear infections, allergies, or sensitive ears.
Do Dogs Really Need Their Ears Cleaned?
Not every dog needs regular ear cleaning. Some dogs have naturally clean ears and only need a quick ear check during grooming.
Other dogs may need more attention. This is more common in dogs with floppy ears, dogs that swim often, or dogs that get wax buildup easily.
So, do dogs need ear cleaning? It depends on your dog’s ears. You should not clean them just because you have a fixed dog ear cleaning routine.
Cleaning too often can irritate the ear canal and make your dog uncomfortable. Before cleaning, always check the ear first.
If you see only mild wax or light dirt, gentle cleaning may help. But if the ear looks red, swollen, painful, or smells very bad, do not clean it at home.
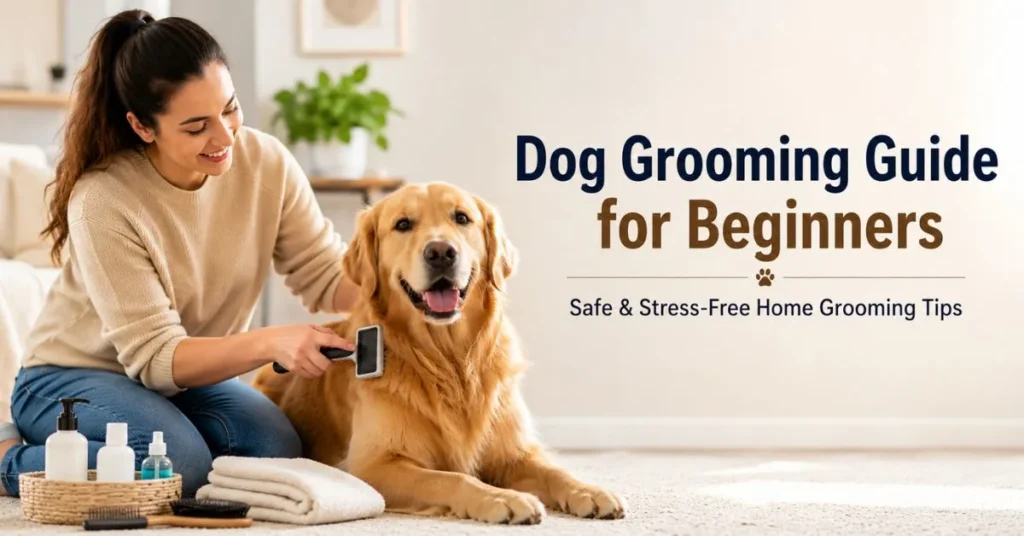
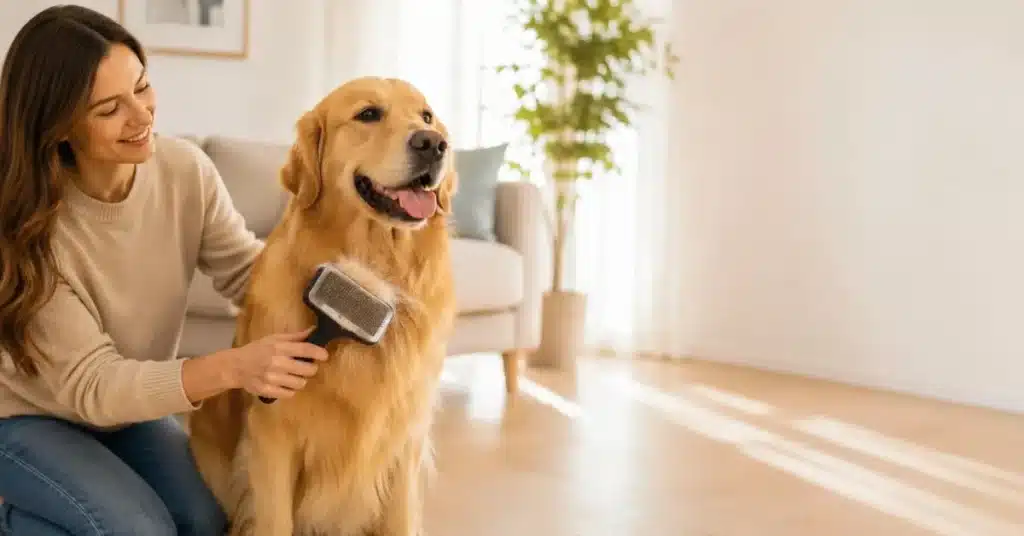
Ear cleaning is one part of a complete dog grooming guide for beginners. New owners can also follow a simple dog care for beginners routine for basic home care.
What Healthy Dog Ears Should Look Like
Before cleaning, you need to know what normal looks like. Healthy dog ears usually look pink or close to your dog’s normal skin color. They should not look red, swollen, or heavily dirty.
A normal dog ear should not have a strong bad smell. A small amount of dog ear wax can be normal, but heavy wax, thick buildup, or discharge may be a warning sign.
Your dog should also feel comfortable when you gently touch the ear flap. If your dog pulls away, cries, or acts painful, do not clean the ear at home.
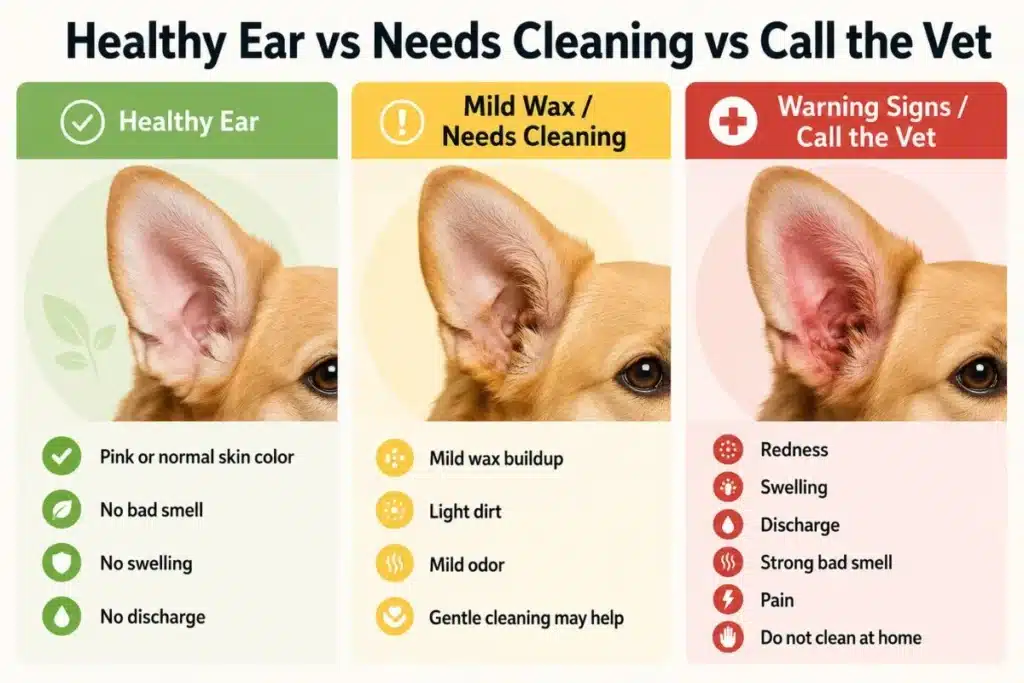
Safe to Clean or Call the Vet?
This quick table helps you decide before you put anything in your dog’s ear. If you are not sure whether it is a dirty dog ear or a possibly infected ear, check the signs first and avoid forcing the cleaning.
| Ear Condition | What It May Mean | What to Do |
| Pink ear, no smell | Normal ear | No cleaning needed |
| Mild wax | Normal buildup | Clean gently if needed |
| Light dirt | Dirty outer ear | Clean carefully |
| Mild smell, no redness | Possible buildup | Check first, then clean gently |
| Red or swollen ear | Possible irritation or infection | Call your vet |
| Strong bad smell | Possible infection | Call your vet |
| Discharge or bleeding | Medical issue | Do not clean at home |
| Dog cries when touched | Pain sign | Stop and call your vet |
A small amount of mild wax or light dirt may be safe to clean at home. But swelling, pain, dog ear discharge, bleeding, or a strong bad smell should not be ignored.
Signs Your Dog’s Ears Need Cleaning
A little wax can be normal, but buildup can make the ear dirty. The key is to separate normal dog ear wax from signs that may need a vet.
Home cleaning may help if your dog has mild wax, light dirt, or a small amount of debris in the outer ear. A mild odor can also happen when wax or dirt starts to build up.
You may also notice your dog shaking their head sometimes or gently scratching the ear. If there is no redness, no swelling, and your dog does not act painful when you touch the ear, gentle cleaning may be okay.
But do not ignore warning signs. A strong bad smell, discharge, redness, swelling, pain, or constant scratching and head shaking may point to something more serious than a dirty ear.
When You Should Not Clean Dog Ears at Home
Sometimes cleaning at home can make the problem worse. Ear cleaning is only safe when your dog’s ear has mild wax or light dirt and does not look painful.
Do not clean dog ears at home if the ear looks red, swollen, or painful. You should also stop if your dog cries, pulls away, or acts uncomfortable when you gently touch the ear.
Avoid home cleaning if there is a strong foul smell, discharge, bleeding, or thick buildup coming from the ear. These can be signs of a possible dog ear infection, ear mites, ear trauma, or another medical problem.
You should also be careful if your dog already has a vet treatment plan, ear medication, or a possible ruptured eardrum. In that case, putting cleaner into the ear without vet advice may cause more irritation.
When in doubt, call your vet first. It is safer than cleaning an ear that may already be infected or injured.
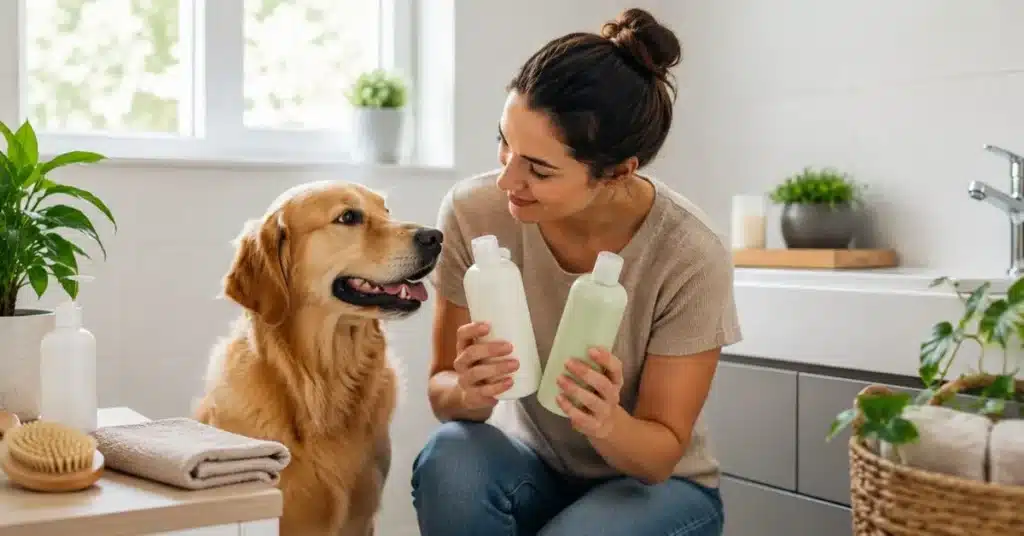
Supplies You Need to Clean Dog Ears
You do not need many tools, but the right tools matter. Using safe dog ear cleaning supplies helps you clean gently without hurting the ear canal.
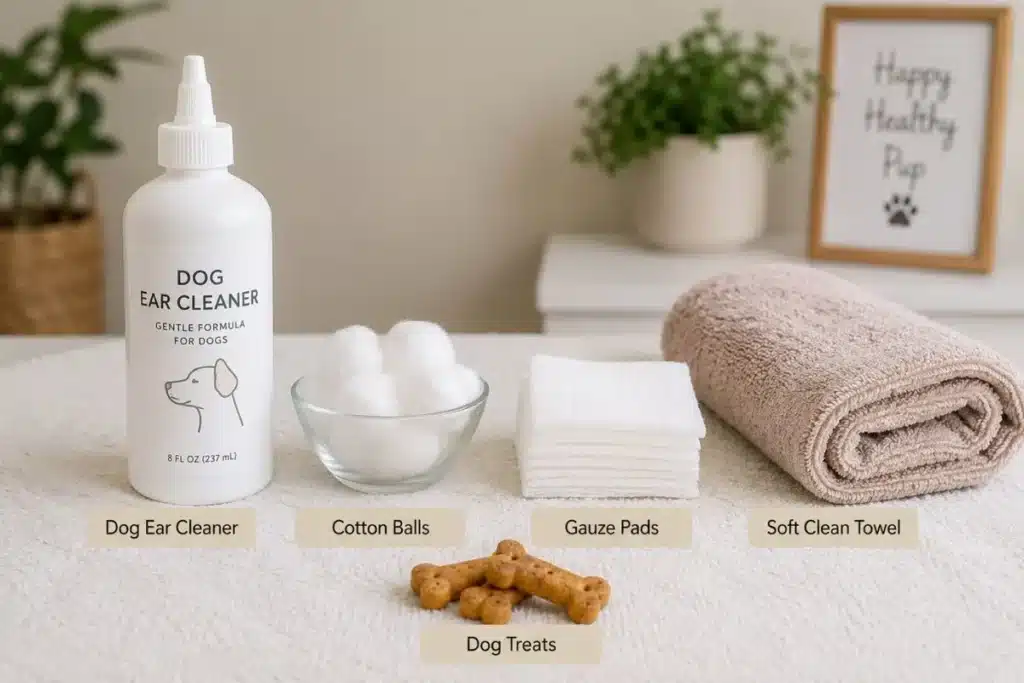
Before you start, keep these items ready:
- Vet-approved dog ear cleaner for routine cleaning
- Cotton balls or gauze to wipe the visible outer ear
- A clean towel to catch extra cleaner when your dog shakes
- Treats to keep your dog calm and reward good behavior
- Good lighting so you can check the ear clearly
- A helper, if your dog is nervous or moves a lot
Avoid using random home mixtures or harsh products. A proper dog ear cleaner is safer for routine cleaning than guessing with household items.
What Not to Use in Dog Ears
Some common household items can irritate your dog’s ears. When cleaning at home, knowing what not to use in dog ears is just as important as knowing what to use.
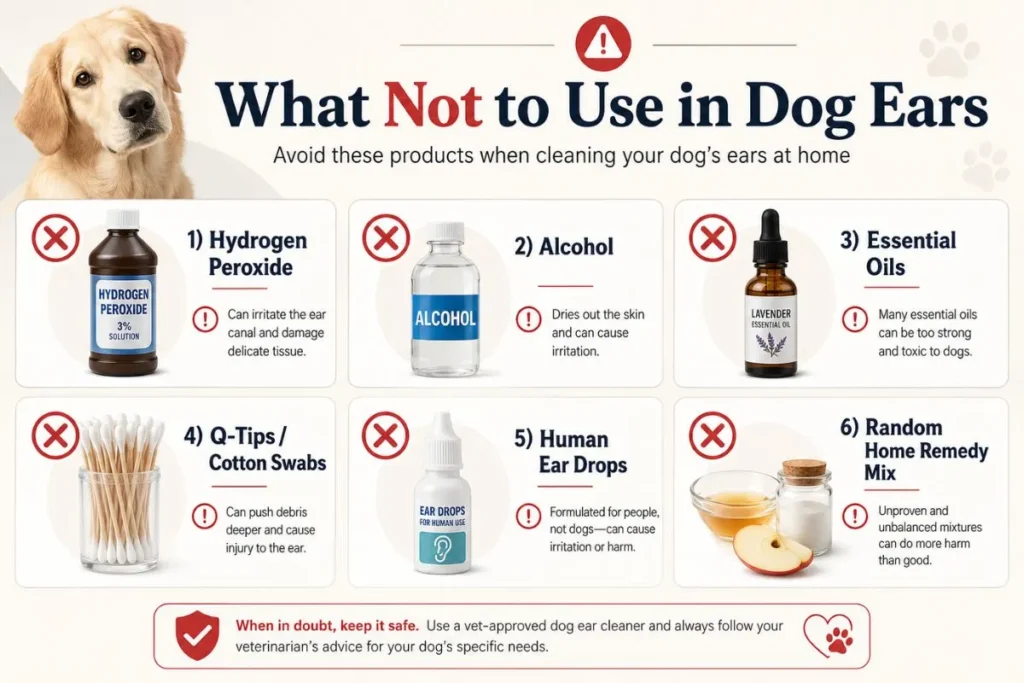
Avoid these items:
- Hydrogen peroxide — it can irritate sensitive ear tissue
- Alcohol — it may dry out or sting the ear canal
- Essential oils — they can be too harsh for dog ears
- Q-tips deep inside the ear — they can push wax deeper or hurt the eardrum
- Random vinegar or home remedy mixes — the wrong mix may cause irritation
- Human ear drops — they are not made for dogs
- Medicated drops without vet advice — these should only be used when your vet recommends them
A common beginner mistake is using cotton swabs too deep inside the ear. For safe home cleaning, only wipe the visible outer ear with cotton balls or gauze.
For safety, veterinary guidance says to avoid harsh ear products when cleaning dog ears. This includes alcohol, hydrogen peroxide, essential oils, and cotton swabs.
The 10-Second Ear Check Test
Before putting a cleaner in your dog’s ear, do this simple check. This quick dog ear check helps you decide whether it is safe to clean or whether your dog may need a vet.
Step 1: Look
Gently lift the ear flap and look inside the visible area. Check for redness, swelling, discharge, bleeding, or heavy dirt. If the ear looks red or swollen, do not start cleaning.
Step 2: Smell
A mild dog ear smell can happen when there is wax or light buildup. But a strong, foul odor may be a warning sign of infection or irritation.
Step 3: Touch
Gently touch around the ear flap. If your dog pulls away, cries, or shows dog ear pain, stop right away.
Step 4: Decide
If you only see mild wax or light dirt, gentle cleaning may be okay. But if you notice pain, redness, swelling, or discharge, call your vet before cleaning.
How to Clean Dog Ears at Home Step by Step
Once the ear looks safe to clean, go slowly and gently. Do not rush this process, especially if your dog is nervous. The goal is to clean mild wax or light dirt without hurting the ear canal.
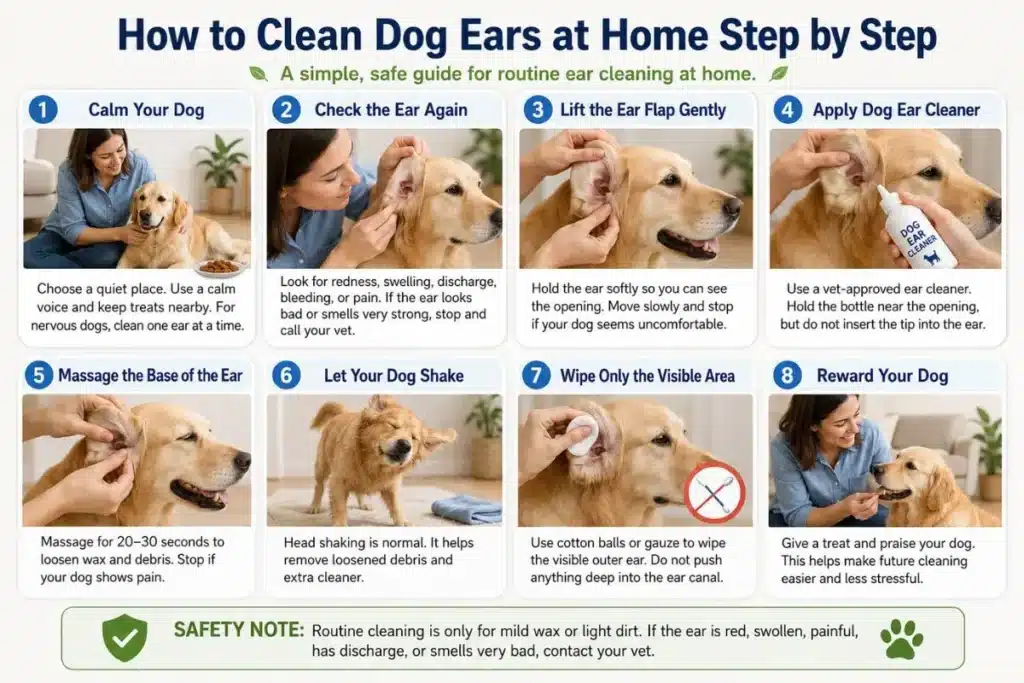
Step 1: Calm Your Dog First
Start in a quiet place where your dog feels comfortable. Keep treats nearby and use a calm voice.
If your dog is excited, scared, or moving too much, wait a few minutes before starting. For an anxious dog, it is better to clean one ear at a time instead of forcing the full process at once.
Use positive reinforcement during the whole cleaning. Give praise and small treats so your dog does not see ear cleaning as something scary.
Step 2: Check the Ear Again
Before using any cleaner, check the dog ear one more time. Look for redness, swelling, discharge, bleeding, or signs of pain.
If the ear looks like a red ear, smells very bad, or your dog pulls away when you touch it, stop here. Do not clean a painful ear at home.
Home cleaning is only for ears with mild wax, light dirt, or normal buildup. If you see warning signs, call your vet first.
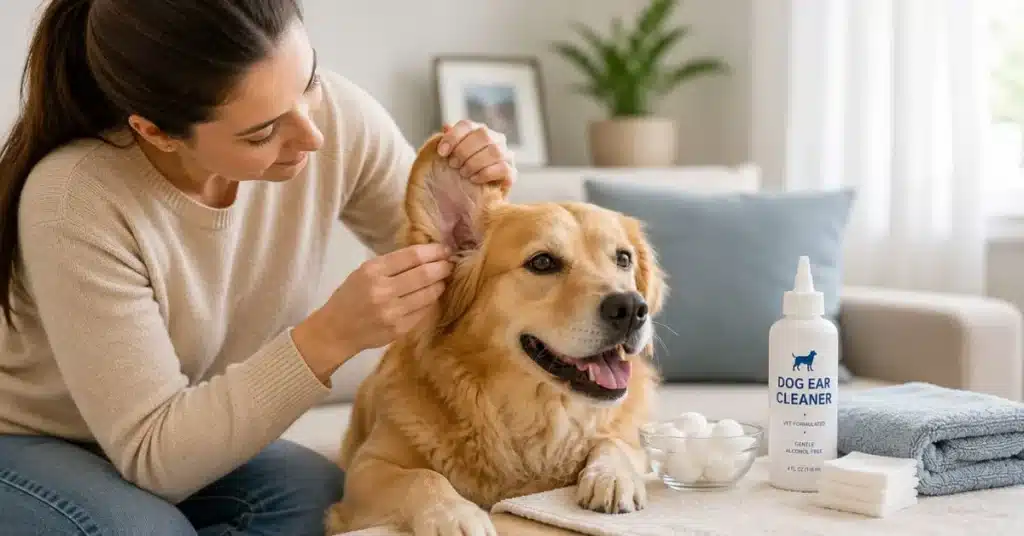
Step 3: Lift the Ear Flap Gently
Gently lift your dog’s ear flap, also called the pinna. Hold it softly so you can see the ear canal opening.
Do not pull hard. If your dog moves away, pause and calm them again.
This step helps you see where the cleaner should go and makes the process easier. Always move slowly so your dog stays relaxed.
Step 4: Apply Dog Ear Cleaner
Use a vet-approved dog ear cleaner or a dog-safe ear cleaning solution. Follow the directions on the product label.
Place the cleaner near the ear canal opening, but do not push the bottle tip deep into the ear. Also, try not to let the bottle tip touch the ear, because this can spread dirt or bacteria back into the bottle.
Use only the amount recommended on the product label or by your vet. More cleaner does not always mean better cleaning.
Step 5: Massage the Base of the Ear
After applying the cleaner, gently massage the base of the ear for about 20–30 seconds.
You may hear a soft squishing sound. That usually means the cleaner is moving inside and helping to loosen debris, dirt, and wax buildup.
Be gentle. If your dog cries, pulls away, or seems painful, stop right away. Pain is not normal during routine ear cleaning.
Step 6: Let Your Dog Shake
After massaging, let your dog shake their head. Dog shaking head after ear cleaning is normal.
This helps bring loosened debris and extra cleaner out of the ear. Keep a towel nearby because this part can be messy.
Do not hold your dog’s head too tightly. Let them shake naturally, then move to the wiping step.
The basic process is to apply dog ear cleaner, follow the ear massage step, let your dog shake, then wipe away visible debris with cotton balls or gauze.
Step 7: Wipe Only the Visible Area
Use a cotton ball or gauze to wipe the visible outer part of the ear.
Only clean what you can see. Do not push anything deep into the ear canal. This is one of the most important safety rules.
Avoid using Q-tips deep inside the ear because they can push wax deeper or irritate the ear. Your job is to wipe the dog’s ear gently, not deep-clean inside the canal.
Step 8: Reward Your Dog
After cleaning, give your dog a treat and praise them. This creates a positive experience.
Even if you only cleaned one ear, reward your dog. This helps them stay calmer next time.
If your dog handled the cleaning well, you can clean the other ear the same way. If they seem stressed, stop and try again later.
How to Clean Dog Ears Without Hurting Them
Most beginner mistakes happen when owners go too deep or move too fast. To clean dog ears without hurting them, keep the process slow, gentle, and focused only on the visible part of the ear.
Use a cotton ball or gauze to wipe the outer ear. Do not push a Q-tip deep into the ear canal, because it can push wax deeper, irritate the ear, or make your dog uncomfortable.
If your dog shows pain, cries, pulls away, or suddenly becomes stressed, stop right away. Safe dog ear cleaning should not feel painful for your dog.
Clean one ear at a time, especially if your dog is nervous. For an anxious dog or a dog that hates ear cleaning, keep the session short and use treats to make it feel positive. Never force the process.
In my experience, most ear-cleaning problems happen because owners clean too deep, clean too often, or try to clean an ear that actually needs a vet.
How Often Should You Clean Dog Ears?
There is no perfect schedule for every dog. So, how often should you clean dog ears depends on your dog’s ear condition, lifestyle, and health history.
You do not need to clean your dog’s ears every week just because it is part of a routine. Clean them only when you notice mild wax, light dirt, or normal wax buildup.
Dogs with floppy ears, dogs that swim often, or dogs that are prone to ear problems may need more regular ear checks. But even then, checking the ears is not the same as cleaning them every time.
Too much cleaning can cause irritation inside the ear canal. This is why over-cleaning dog ears can sometimes make the ear more sensitive instead of healthier.
A safe dog ear cleaning frequency is based on need, not a fixed rule. If your vet gives your dog a special cleaning routine, always follow that advice.
Common Dog Ear Cleaning Mistakes
These mistakes can make ear cleaning uncomfortable or risky. Most dog ear cleaning mistakes happen when owners clean too deep, use the wrong product, or clean an ear that should be checked by a vet first.
Avoid these common mistakes:
- Pushing a Q-tip deep inside the ear canal
- Using hydrogen peroxide in your dog’s ears
- Using alcohol or alcohol-based cleaners
- Trying to clean an infected ear at home
- Cleaning too often and causing irritation
- Handling the ear too roughly
- Using the wrong dog ear cleaner
- Forcing the process when your dog is scared
- Letting the bottle tip touch the ear
- Trying to deep-clean beyond the visible outer ear
The safest rule is simple: only clean the visible area with cotton balls or gauze. Do not push tools deep into the ear, and do not keep cleaning if your dog shows pain, fear, or discomfort.
Over-cleaning dog ears can also irritate the ear and make the problem worse. If the ear looks red, swollen, painful, or smells very bad, stop and call your vet.
How to Keep Your Dog’s Ears Clean Between Cleanings
Good maintenance means checking more and cleaning less. You do not need to clean your dog’s ears every time you look at them. A simple dog ear maintenance habit can help you notice problems early.
Check your dog’s ears during your regular dog grooming routine. Look for changes in wax, dirt, redness, or odor.
After a bath, make sure the outer ear area is dry. If your dog swims often, check the ears afterward because moisture can sometimes make buildup or irritation more likely.
Dogs with floppy ears may need extra checking because their ears can trap more moisture and dirt. But remember, checking does not always mean cleaning.
Never use perfume, deodorizer, or strong sprays to cover a bad smell. A strong ear odor may be a warning sign, not just a hygiene issue.
You can also gently touch your dog’s ears during calm moments. This helps your dog feel more comfortable with ear handling.
Ear checks can be part of your dog hygiene routine at home to keep dog ears clean without over-cleaning.
When to Call a Vet
Ear cleaning cannot replace a vet when symptoms look medical. Routine cleaning is only for mild wax or light dirt. If your dog’s ear looks painful or infected, it is safer to stop and contact a veterinarian.
Call your vet if you notice:
- Strong bad smell from the ear
- Dog ear discharge, pus, or thick fluid
- Bleeding inside or around the ear
- Swelling or redness
- Your dog cries, pulls away, or shows pain
- Your dog keeps shaking their head
- Constant ear scratching
- Loss of balance or unusual head tilt
- Suspected ear mites
- Repeated ear problems or frequent infections
These can be dog ear infection signs or symptoms of another ear problem. Do not try to cover the smell with wipes, sprays, or home remedies.
Redness, pain, foul odor, or discharge can be ear infection signs, so home cleaning should stop until your vet checks the ear.
FAQs About Cleaning Dog Ears at Home
Can I clean my dog’s ears with water?
Plain water is usually not the best option for routine dog ear cleaning. Water may not remove wax buildup properly and can leave extra moisture inside the ear.
A dog-safe ear cleaner is a better choice because it is made for your dog’s ear canal. Use it only when the ear looks safe to clean.
Can I use hydrogen peroxide to clean dog ears?
No, you should not use hydrogen peroxide to clean dog ears. It can irritate the sensitive skin inside the ear and may make the problem worse.
For safe routine cleaning, use a vet-approved dog ear cleaner instead. If the ear already looks red, painful, or infected, call your vet before using anything.
Can I use Q-tips to clean dog ears?
Do not push Q-tips deep into your dog’s ear canal. They can push wax deeper, irritate the ear, or even cause injury.
Use a cotton ball or gauze to wipe only the visible outer ear. If you cannot see the area clearly, do not try to clean deeper.
Why does my dog shake their head after ear cleaning?
Dog shaking head after ear cleaning is usually normal. It helps loosened wax, debris, and extra ear cleaner come out of the ear.
Keep a towel nearby, because this step can be messy. But if your dog keeps shaking their head for a long time after cleaning, check for pain, redness, or irritation.
How often should I clean my dog’s ears?
There is no fixed schedule for every dog. Clean your dog’s ears only when you see mild wax, dirt, or normal buildup.
Some dogs need more checking, especially dogs with floppy ears or dogs that swim often. For a deeper routine, read our guide on how often should you clean dog ears.
Can I clean puppy ears at home?
Yes, you can clean puppy ears at home, but only if the ears look normal and there is mild wax or light dirt.
Be extra gentle. Puppies can be nervous, so use treats, go slowly, and stop if your puppy pulls away or seems painful.
What if my dog hates ear cleaning?
If your dog hates ear cleaning, do not force it. Go slow, use treats, and clean one ear at a time.
For an anxious dog, short sessions work better than trying to finish everything at once. Use positive reinforcement so your dog connects ear cleaning with something calm and safe.
When should I not clean my dog’s ears?
Do not clean your dog’s ears if they are red, swollen, painful, bleeding, have discharge, or smell very bad.
These can be warning signs of an infection or another ear problem. Before trying home cleaning, read our guide on how to tell if your dog has an ear infection and contact your vet.
Final Thoughts on Cleaning Dog Ears at Home
Safe dog ear cleaning starts before the cleaner touches the ear. Always check your dog’s ear first and make sure there is no redness, pain, discharge, swelling, or strong bad smell.
If you only see mild wax or light dirt, gentle routine cleaning at home may help. Use a vet-approved dog ear cleaner, let your dog shake, and wipe only the visible outer ear with cotton balls or gauze.
Avoid Q-tips, hydrogen peroxide, alcohol, and anything harsh inside the ear. If the ear looks painful, infected, or smells very bad, stop and call your vet.
For a full home grooming routine, read our dog grooming guide for beginners.
This guide is for routine home ear cleaning only and is not a replacement for veterinary advice. If your dog has pain, redness, discharge, or a strong odor, contact your veterinarian.